RK Vocal Studio
Vocal Injury
Thursday, March 21, 2019 by Rebecca Keogh | Uncategorized
.png)
Dancers, and athletes injure themselves on the job all the time and have a team of people ready to rehabilitate them. But what about singers? Well, we injure ourselves too! It is not uncommon to end up with a vocal injury but we often don't do anything about it out of fear of being judged or being worried we are over reacting. There are qualified professionals who are there to help us when we need it. Trust your gut and if you think something is wrong go to your GP and tell them your concerns. They will refer you to the right person when the time comes.
Last year I struggled on and off with hoarseness having been out socialising in noisy pub environments where I was pushing my voice to be heard. Singing actually wasn’t an issue, although the two combined along with a busy teaching schedule, taking very few breaks, and working long days, didn’t help. Winter then gifted me with laryngitis on top of all this so I went to my GP and asked to be referred to a laryngologist for a stroboscopy.
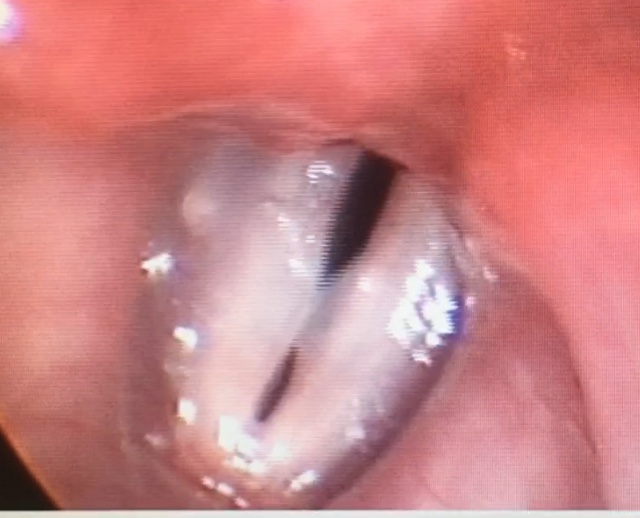
A stroboscopy is basically where they put a camera down your throat and take a short video of your vocal folds in action. I had a rigid scope done (one that goes straight into your mouth) but it is possible to get it done with a flexible scope too (one that goes up your nose and down your throat) This will give you a clear image of the vocal folds, meaning you are less likely to miss something due to bad visibility.
It turned out I had pre nodular edema (swelling of the vocal folds). Which can be caused by a number of things including; overworking your voice, illness, stress, fatigue, poor hydration, smoking, allergies and coughing to name but a few. Below is a screen grab of the actually footage taken of my vocal folds where you can see the swelling in the centre of the vocal folds. They shouldn't have a gap above and below the swollen bit.
In Reena Guptas article ‘Bad Technique and Vocal Injury’ she talks about this, saying that the most common cause of vocal injury is caused by upper respiratory tract infections. Where the vocal folds become swollen and then the person talking, or singing with the swollen vocal folds can cause bruising. She also talks about ‘vocal perfect storm’, which is where a number of things combined lead to vocal injury. You can read her article here: https://www.ohniww.org/bad-technique-and-vocal-injury/
Once I had this information I was able to make a vocal recovery plan. I cut back on talking A LOT over December and even ordered a badge for when I go out which says ‘I’m on vocal rest’, (so people don’t think I’m just antisocial). In January I reduced my teaching hours and added more breaks and made an appointment with an SLT (Speech Language Therapist) who would help me find a better way to use my speaking voice, especially in noisy environments.
Thanks to the help of my laryngologist and SLT I now have a clear picture of what changes need to be made to get my voice to a healthier place. Coincidentally I went to a jazz gig the night before my first appointment where I was chatting away for the night unaware that I would wake up hoarse again. So we focused on reducing extrinsic muscle tension which was contributing to my hoarseness. I was amazed how my voice lifted from a dulled husky sound to a freer brighter tone after just a few minutes of working on the throat and neck area. She is trained to do this, but she was able to give me some exercises that I could do at home in between appointments.
If you think you may have a vocal injury, go to your GP and ask them to refer you to a laryngologist.
Keep an eye on my blog for updates on my vocal recovery journey. Happy and healthy singing!
.png)
Useful links;
Stroboscopy video (Singing Vocal Folds);
Singing - A Mind, Body & Spiritual kinda thing
Thursday, March 14, 2019 by Rebecca Keogh | Uncategorized
.png)
It is useful to think of singing in a holistic sense connecting mind, body and spiritual aspects of yourself. Becoming aware of these things is a good place to start. You may find that vocal technique alone is not enough to get you over every singing hurdle. This post touches on elements of mind, body and spiritual aspects of singing and why it is important to connect with each one and is jammed packed with resources for you to explore.
Mind
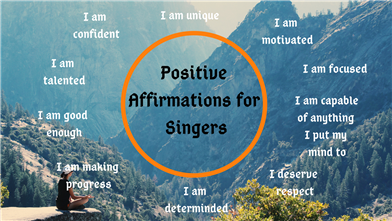
Imagine picking up a lemon from a fruit bowl. Cut it in half and lift it towards your mouth. Imagine what it tastes like. You will probably find that your taste buds go crazy and start salivating. You were able to imagine something which caused a physical reaction. Knowing that, you can see how negative thoughts and emotions might have a negative physical reaction in your body, including your voice. It might be useful to incorporate some mindfulness or relaxation methods into your routine such as listening to calming music, or writing down or saying some positive affirmations. Singing is also known to help improve your memory!
Similarly, bad posture or stiffness in the body can have a domino effect on the voice. Last year at the Vocology In Practice Seminar one of the speakers gave an example where a singer was having issues with their voice and after a lot of exploring they discovered that the singer actually had an issue in their foot that had worked its way up the body and had actually twisted the larynx slightly over time. This was amazed me.
By including some simple stretches or yoga into your vocal warm up time, it can really help free your voice from tension that may exist as well as helping to calm any nerves that you may have. I often do some stretches with students who seem stressed or cold as it can help calm them down and release any tension they may be holding from the day.
Neil Dennehy, a physiotherapist from Clonmel has put together a short video with some simple stretches that you may find useful. Take 2 or 3 ideas and start incorporating them into your routine. Even just 5 minutes of stretching can make a huge difference. I do head & shoulder rolls, side to side motions, and back to front motions for example.
Simple stretches
https://www.youtube.com/watch?v=645rVzRNm8A
I've included some exercises to reduce extrinsic muscle tension (muscles surrounding your larynx and neck area;
- Jaw movement: (Side to side, open and close, chewing motion)
- wow wow wow wow: (Say wow in a really over exaggerated way widening the mouth as you do.)
- Lip thrills/bubbles: https://www.youtube.com/watch?v=jZ8CGNAxCbg
- Tongue stretches: (In and out of your mouth, round & round, side to side etc) Check out this video by Dr. Dan for further info and some more tongue exercises: https://www.youtube.com/watch?v=hwk3It813z8
- Shoulder rolls: Front to back and back to front motions.
- Oral Resonance: Focus on the tip of your tongue when speaking to help reduce strain in your larynx (voice box)
 . Photo: This guys got the hang of it!
Spiritual
Singing is known to have healing abilities, helping to reduce stress and anxiety, promote group bonding and relaxes the body. Anyone who sings will know how good it makes you feel inside, or will have gotten butterflies or tingles when hearing another singer deliver a beautiful vocal performance. Singing will often evoke tears of emotion, having a kid of cathartic effect on us. I know I’ve often arrived home from a long day in work and had band practice which I didn’t really want to go to as I was so drained from the day, but after 10 minutes singing, all the stress and anxiety melted away and my energy had returned, every time. It is often a kind of therapy for us. Find music you love to listen to and sing and it will enrich your life.
Useful Resources
Here are two links to spotify playlists that I listen to;
Peaceful Music
https://open.spotify.com/user/spotify/playlist/37i9dQZF1DWZqd5JICZI0u?si=I5HPG1SKRtqMXI4Jfgu8Wg
Focus Music
https://open.spotify.com/album/4MmTwjP7bqA9zy7FsFyPBe?si=6pQa_HQfT821gCWpUOIFsQ
El Greys vocally lead meditative music
https://m.youtube.com/c/InfinityCalling
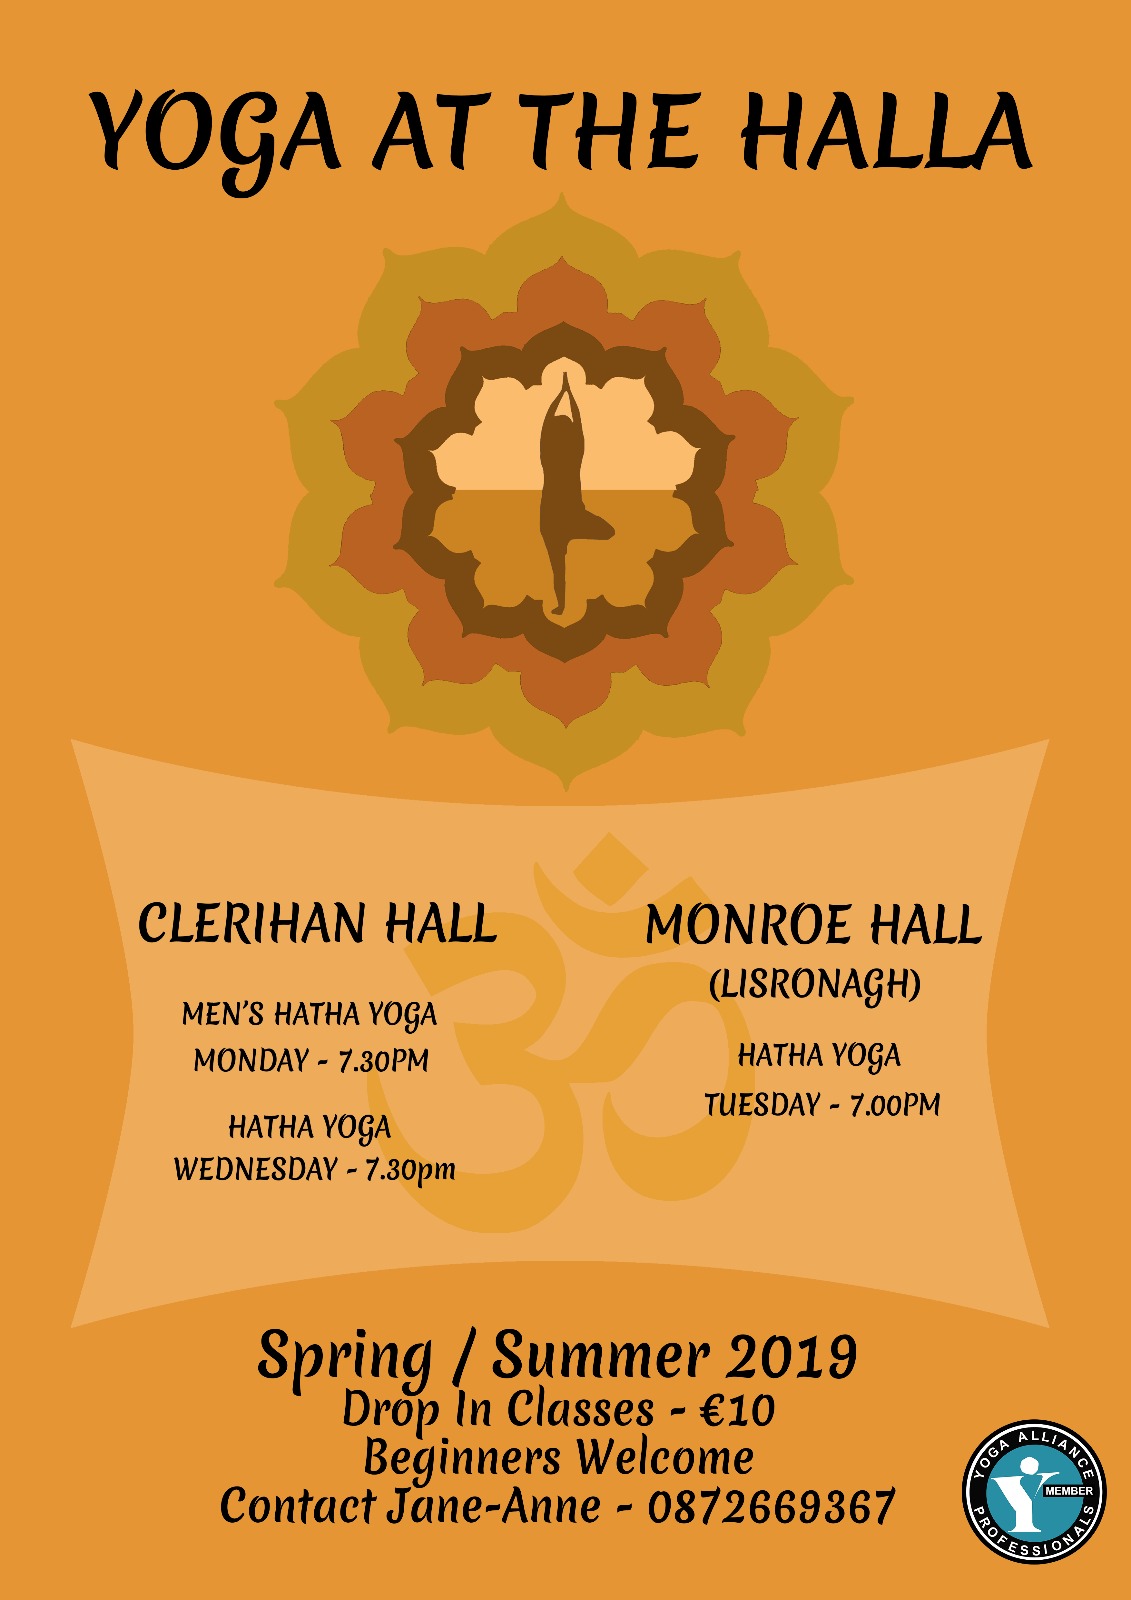
Yoga Classes in South Tipperary
A sample keyboard practice plan for parents of beginners!
Thursday, March 7, 2019 by Rebecca Keogh | practice, parents, kids, piano
Keyboard practice for beginners
.png)
Ever wonder what you can do to help your child with piano practice? You are paying for the lessons so you want to make sure you are getting value for money! All you need to know is what they need to practice and help them plan in their daily practice sessions. They should know what to practice from the previous lesson but if they cant remember, it will be written in their notebooks or emailed to you. This blog post should help you to help them. If you have any questions feel free to message me via email or any of my social platforms.
How long should practice be?
Set a timer! 10 minutes twice a day is recommended for beginners. Regular 10 minute practice sessions are far more productive then irregular 60 minute sessions and much easier to squeeze into busy after school schedules!

When should you practice?
It can help to tie keyboard practice to another event that happens every day. For example, straight after homework, or dinner for example. So every time that event happens, it is expected that keyboard practice will be done.
What should you practice?
A combination of music theory, scales, chords, rhythm and songs may be included in their practice session. If they are going to lessons they should practice whatever they last did in their lesson as well as anything else their teacher has asked them to go over. Below, I have included a sample practice session. The first 10 minutes could focus on revising theory like note values & other musical symbols, scales and chords. The second 10 minutes could focus on the song they are learning.
Example practice session for beginners
Try this for a week with your kids and see how much progress they make!Music Theory
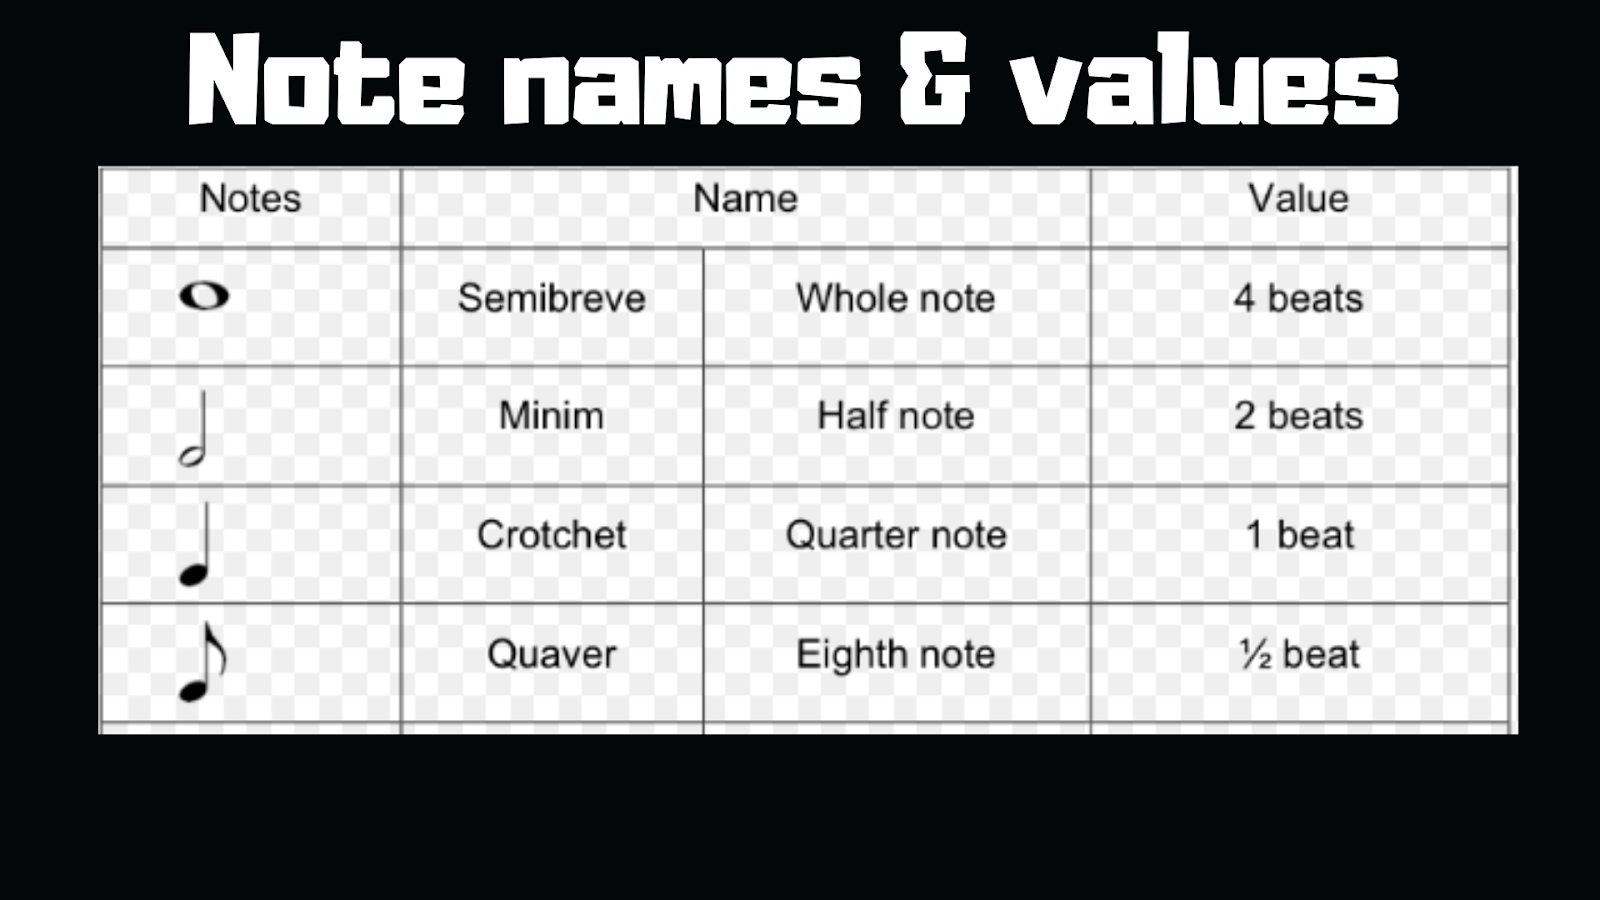
Draw 10 of each in your notebook. Write the note name & values above each one. Then cover over the note names & values and see if you can remember any of them. Ask a family member to test you. Good luck!
Scales
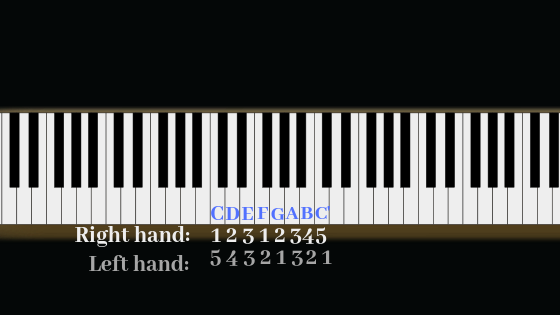
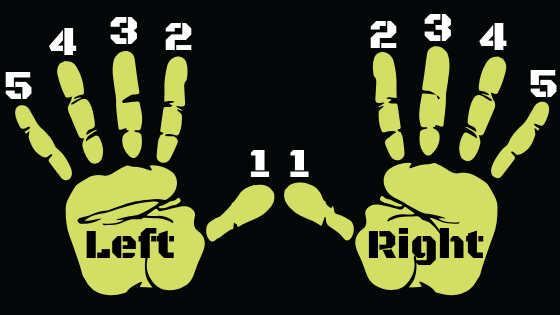
Play through your scales with a drum track or metronome 5 - 10 times each. (depending on how well you can play it after 5 times). Make sure you are using the correct fingering as shown by your teacher. Start slow (no more than 50 bpm). If you master the scale at this speed, up it to 55 bpm, then 60bpm, and so on.
Example..
Remember!
Your thumb goes under after your middle finger (no.3) onto the F key when playing with your right hand.
Your middle finger goes over after your thumb (no.1) onto the A key when playing with your left hand.
If the student is a complete beginner, practice the scales with no metronome first, focusing on playing the correct notes with the correct fingers. Once this is mastered, then introduce the metronome.
Chords
Practice placing fingers down on the keys at the same time and then lift your fingers off the keys and place back down again. Repeat this 5 - 10 times.
| C Major:
|
C
|
E
|
G
|
| Right hand:
|
1
|
3
|
5
|
| Left hand:
|
5
|
3
|
1
|
Songs
Focus on the sections that you are finding difficult first. For example, if you are learning a song and you struggled with bars 5 & 6, then this is what you should practice first.
- Play through the notes first without rhythm. Making sure you use the correct fingering.
- Clap the rhythm 5 times.
- Then try adding the rhythm to the notes. Master 1 bar at a time until you have gotten through all the bars you were given to practice.
- Then play through the whole section without stopping. Keep going even if you make a mistake. This will help you get a feel for how the piece flows.
- If you made any mistakes or found any bars difficult, go back over those particular bars. Then try play the piece from start to finish again.
- Circle any sections that you struggled with with pencil so your teacher can help you with it at your next lesson.
